The next stage in the game of horse packing is finding and fitting the pack saddle.
There are two main types of pack saddles: the Sawbuck and the Decker, as well as several newer varieties, including some "no rope" types, and even packing systems that are designed to work off a riding saddle. Once again here, it’s personal choice. There’s no one right answer. You got your right answer if it works for you and your horse.
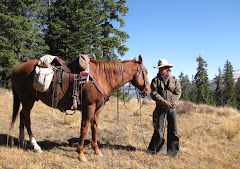
Our personal preference is the Sawbuck, pictured above. It works for us and our horses, so we stick with it. The Sawbuck looks like the device of the same name that is used to secure a log when cutting it into firewood, with hard plates or “bars” that fit behind the horse’s withers and distribute the weight along the horses’ back. We start with a thin wool pad, then a heavy, longer pack saddle pad under the saddle. Rigging is attached to the Sawbuck and secured and adjusted to the animal. Then panniers, or pack bags, are hung from the cross bars. On top of the whole load, we use a folded tarp or mantie, to cover the load, and hitch it securely with a cinch and long pack rope.
Variations on the Sawbuck have been around for as long as folks have been packing in the west, and we still have some Sawbucks here that I think are about that old, and remain in good working condition. It works for us; we are comfortable with the design, so we continue to use this method. We have several saddles to choose from that can fit a wide variety of horse shapes and sizes, from standard mule to Arabian to the Percheron-Quarter Horse cross pictured above.
Fit is everything. That’s where we’ll start. If the pack saddle does not fit your horse well, you’ll have a sore horse and no one to blame but yourself when your horse refuses to accept a load. There’s no excuse for an uncomfortable horse. Take care of your stock. Bottom line. I believe if you don’t care to care well for your stock, don’t pack.
Assuming you do care for your stock, that’s why we’re choosing to be out there with them, start by making sure the saddle fits well and your rigging is properly adjusted. Every horse is going to be slightly different, so get comfortable changing positions and adjusting the rigging with each horse.
Start with your pads – place them smoothly and well centered on your horse where they will protect withers, sides and back from friction and any direct contact from the saddle and the load. The Sawbuck should be fit first without the pads to ensure the correct size. Once you are sure of proper size, center your saddle over the padding and adjust the rigging so that there is no binding with the breeching, and nor does it hang low to rub your horse raw. You’re looking for a good fit here. The rigging is designed to hold things together, not just decoration, so we should fit it well, not just allow it to hang there.
There are a lot of adjustments to the pack saddle rigging. Spend the time to properly fix and place each strap for the most comfortable fit for your horse. The only tight fit should be with both cinches. Like mentioned in an earlier Floyd Story, you can over tighten the load and have a very uncomfortable horse. Like with a good rider that can safely ride with a loose cinch by adjusting his or her body weight, more important that a super-tight cinch is the equally balanced loads. We’ll discuss that further in our next installment.
Once your rigging has been properly adjusted and tightened, be sure to carefully fold over the cinch straps so that they do not drag and do not bulk up under the load. Likewise, when unsaddling the pack horse, take the time before removing the saddle to fold back the cinch straps, and hook back all parts of the rigging back onto the Sawbuck, like folding a tent back together. This will not only make it safer to remove the saddle from the horse, and easier to put the saddle back on it’s saddle rack, but it will make it easier to pull out the rigging when put back in place on your horse your next time packing.